
Tassels have really exploded this year, as they can be found adorning everything from rompers to strappy sandals. They are even making a statement in jewelry and home decor. Personally, I'm loving the tassel charms on beach bags trend that I've been seeing all over social media. It's vibrant, fresh and feels new. But these bags cost a little more than I would like to pay, so I decided to get creative and make one myself.


After you've gathered everything you will need to make your own tassel charm, here comes the fun part; making the tassels! Now, I've pinned a ton of step-by-step guides on my Pinterest to help you create your tassels.
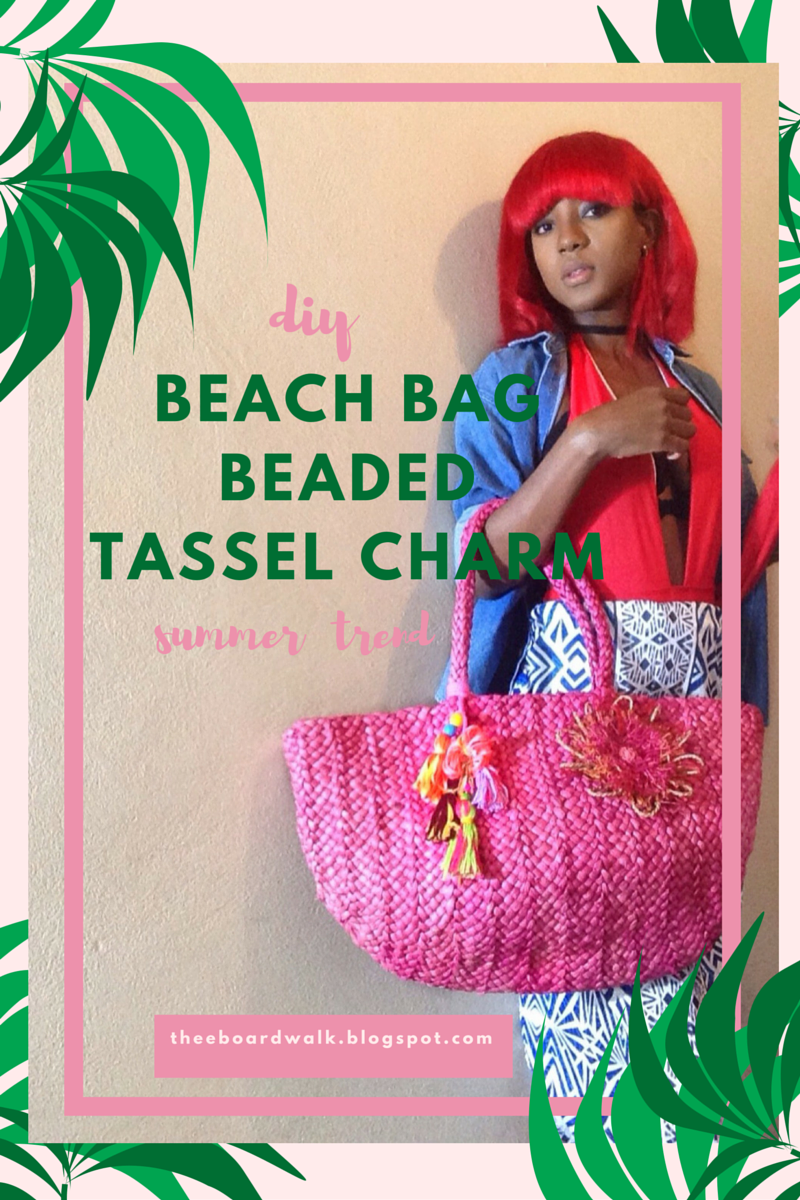
Once you get the hang of that, I suggest making the loop on each of your tassels a little longer so that you will be able to slip 2 or 3 of the beads onto it. Then tie each tassel onto the rope and knot tightly onto the handle of your beach bag. I also added a rhinestone and chain detail to my charm, along with a flower detail using that same cotton string. There's no limit to what you can do once your creative juices start flowing!


To make your own tassel charm, you will need:
- A beach bag - I used this fuchsia colored straw tote with a flower detail that I had already owned.
- Cotton string - I suggest using colors which complement the beach bag.
- Old jewelry - You will need these specifically for the beads. Or you can purchase beads separately. I really just wanted to focus on using things that I already had around the house.
- Rope - I used the handles from an old Victoria's Secret bag. You will need rope to tie your tassels onto the beach bag. You can totally use cotton string to achieve this but I found that it was too flimsy so the rope definitely offered more support.
- Scissors - To cut your tassels.
After you've gathered everything you will need to make your own tassel charm, here comes the fun part; making the tassels! Now, I've pinned a ton of step-by-step guides on my Pinterest to help you create your tassels.
Once you get the hang of that, I suggest making the loop on each of your tassels a little longer so that you will be able to slip 2 or 3 of the beads onto it. Then tie each tassel onto the rope and knot tightly onto the handle of your beach bag. I also added a rhinestone and chain detail to my charm, along with a flower detail using that same cotton string. There's no limit to what you can do once your creative juices start flowing!


I had so much fun doing this DIY and I saved a few hundred dollars which is even better! Please comment below and let me know what you think of my tassel charm, and share your own creation.
xo,
Jhalisa
No comments:
Post a Comment